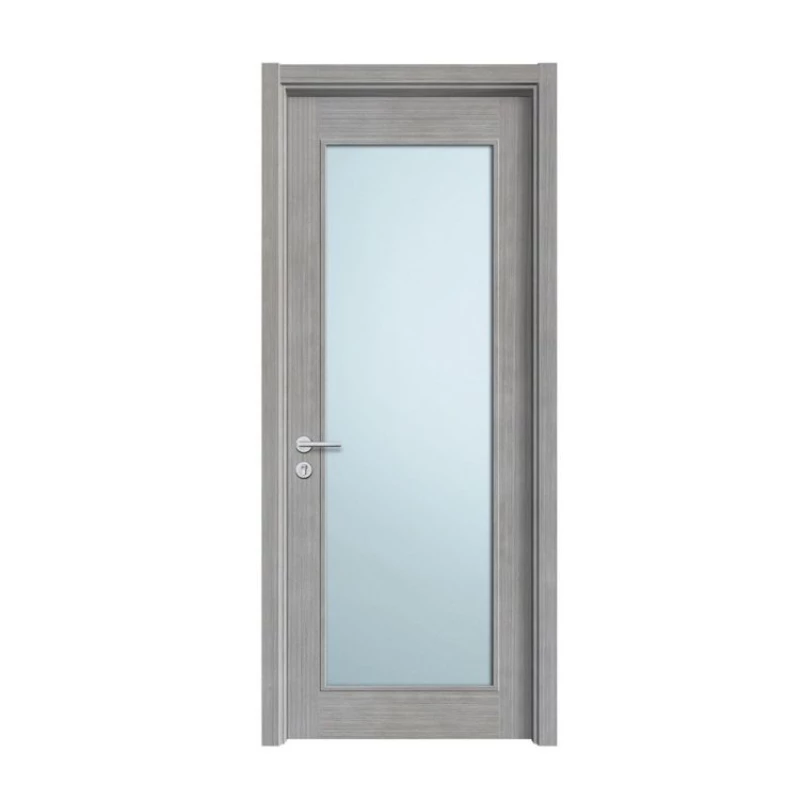
Modern grey waterproof interior door with glass
- Standard Size
- 2050*960 (Accept Customization)
- Open Direction
- Inward/Outward/Left/Right
- Accessories
- Handle;Lock;Hinge;Peephole;Door Bell;Bolts
- The Finish of the Door
- Natural or technical veneer+painted wood
- Door Panel
- E1 5mm MDF
- Material
- Wood
Other recommendations for your business
How to Install an Interior Door?
Introduction:
Installing an interior door is a manageable task that can be accomplished with some basic tools and DIY skills. In this step-by-step guide, we will outline the process of installing an interior door, including preparation, measurements, and installation techniques.1. Gather Tools and Materials:
Before starting the installation, gather the necessary tools and materials. This typically includes a tape measure, level, screwdriver, hammer, chisel, drill, screws, shims, and the door itself. Ensure that you have the correct size and type of door for the opening.2. Prepare the Opening:
Start by preparing the opening where the door will be installed. Remove any existing trim or molding around the doorway. Ensure that the opening is square and plumb, making any necessary adjustments or repairs. If needed, add a door jamb or casing to frame the opening.3. Measure and Trim the Door:
Measure the height and width of the door opening. Transfer these measurements to the door, marking the areas that need to be trimmed. Use a circular saw or hand saw to carefully trim the door to fit the opening, following the marked lines. Remember to double-check the measurements before cutting. According to the measurement we can know the size of the door, usually the size can be divided into the standard size and non-standard size of the door.4. Install the Hinges:
Place the door in the opening, resting it on shims to achieve the desired height and clearance. Mark the hinge locations on the door and jamb. Use a chisel to mortise the recesses for the hinges. Attach the hinges to the door and jamb using screws, ensuring they are flush and secure.5. Hang and Align the Door:
With the hinges installed, carefully hang the door onto the hinges, aligning them properly. Use shims to adjust the position and ensure the door is level and plumb. Check for even spacing between the door and the jamb on all sides. Once aligned, secure the hinges with screws.6. Install the Door Handle and Hardware:
Mark and drill holes for the door handle and any other hardware, following the manufacturer's instructions. Install the door handle, latch, strike plate, and any additional hardware according to the provided guidelines. Test the functionality of the door, ensuring it opens and closes smoothly.7. Add Trim and Finishing Touches:
To complete the installation, add trim or molding around the door frame. Measure and cut the trim to fit, then secure it using nails or screws. Fill any gaps or nail holes with wood putty, sanding and painting the door and trim as desired for a finished look.Conclusion:
Installing an interior door involves preparation, measurement, trimming, hinge installation, door alignment, hardware installation, and finishing touches. With the right tools and careful execution, you can successfully install an interior door to enhance privacy, aesthetics, and functionality within your living space. For more styles of interior door, youcan contact USELUCK DOOR. Interior doors such as HNP-027, HNP-015 are very popular in the market.
Supplier's popular products
Contact Supplier
We have more categories for you. lf you can't find the products you want above,just fill in the form and tell us whatproducts you want to import from China.


